
Introduction
If you want to keep your bathroom neat and your shower essentials within easy reach, learning how to put a shower caddy together is essential. A properly assembled shower caddy maximizes storage space and helps maintain order in even the smallest shower areas. Whether you are new to DIY projects or simply upgrading your bathroom organizer, this guide will teach you how to assemble and install different types of shower caddies step-by-step, ensuring a hassle-free and secure setup every time.
Table of Contents
2. Understanding the Different Types of Shower Caddies: Which One Is Best for Your Bathroom and Why?
Choosing the right shower caddy is the first crucial step. Here are the most common types explained in detail:
- Tension Pole Shower Caddies: Adjustable poles that extend between the floor and ceiling with spring tension, perfect for renters or those who want damage-free installation.
- Suction Cup Shower Caddies: Attach directly to your shower walls with suction cups, best for smooth surfaces but may require reapplying over time.
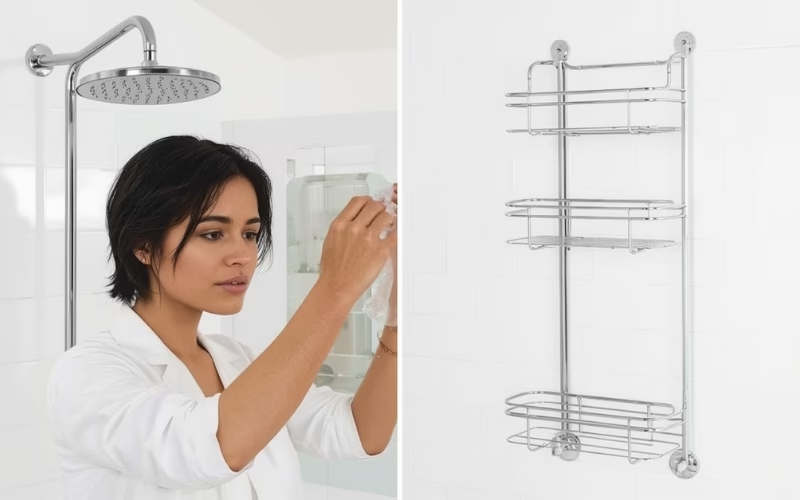
- Wall-Mounted Shower Caddies: Fixed in place using screws or adhesive for a permanent, sturdy solution.
- Spring-Loaded Shower Caddies: Tension poles with spring mechanisms for easy adjustments and firm fit.
Understanding the pros and cons of each will help you decide which suits your shower setup best.
3. Step-by-Step Assembly Guide: How to Put a Shower Caddy Together for Different Installation Methods
Follow these clear steps to assemble and install your shower caddy smoothly:
- Unbox and inspect all parts to ensure completeness.
- Gather necessary tools, which may include a drill, screwdriver, or nothing if using tension poles.
- Clean and dry your shower walls or floor and ceiling to ensure proper adhesion or grip.
- Assemble parts according to your caddy type:
- Extend and secure tension poles.
- Attach suction cups to baskets and press firmly on clean surfaces.
- Mark, drill, and screw wall-mounted brackets cautiously.
- Arrange shelves and hooks in positions that maximize usability.
- Test stability before adding items.
This methodical approach guarantees a durable, reliable shower organizer.
4. How to Put a Shower Caddy Together with Screws or Adhesive: Detailed Instructions for Wall-Mounted Units
Wall-mounted shower caddies provide permanent storage but require precise installation:
- Measure and mark exactly where each shelf and bracket will go.
- Use a level to ensure perfect alignment before drilling.
- Drill pilot holes cautiously, particularly on tile surfaces, to prevent cracks.
- Insert wall anchors where necessary to support screws.
- Secure screws tightly without overtightening.
- Attach shelves securely and double-check alignment and sturdiness.
- When using adhesive, thoroughly clean the mounting surface, apply the adhesive according to instructions, and let it set before placing items.
Following these instructions ensures your caddy stays securely mounted without damage.
5. How to Install Shower Caddy with Suction Cups: Expert Tips to Make It Stick and Stay Strong
Suction cup shower caddies are convenient but need perfect conditions for lasting grip:
- Select smooth, non-textured surfaces like glass or glossy tiles.
- Clean surfaces thoroughly with rubbing alcohol to remove any residues.
- Allow the area and suction cups to dry completely before mounting.
- Lightly moisten suction cups to create a strong seal.
- Firmly press and hold suction cups in place for at least 30 seconds.
- Avoid overloading the shelves beyond recommended weight limits.
- Regularly reapply suction cups to prevent slippage and maintain strength.
These best practices help your suction cup shower caddy stay put longer.
6. How to Assemble Popular Shower Caddy Models: Step-by-Step Instructions for Top Brands and Designs
Learn the specific assembly process for popular models:
- 4 Shelf Tension Pole Shower Caddy: Extend pole to fit between floor and ceiling, attach baskets from bottom to top, and hang hooks or bars.
- Mainstays Tension Pole Shower Caddy: Assemble pole segments, secure spring mechanism, slide baskets into position, and verify stability.
- Black and Decker 3 Tier Tension Pole Caddy: Fix rubberized grips to poles, adjust height, and mount shelves with included screws.
- Vanderbilt Suction Cup Basket: Clean surface, press suction cups firmly, mount basket, and check suction integrity.
- Artika Azzuro 4 Tier Tension Pole Caddy: Attach poles securely, install anti-slip feet, and arrange baskets as instructed.
These model-specific guides help you install your chosen shower caddy efficiently.
7. Troubleshooting Common Issues When Putting Together Your Shower Caddy and How to Fix Them
Address these frequent problems for a better shower caddy experience:
- Loose or Sliding Tension Poles: Retighten the spring mechanism and reposition rubber grips on floor and ceiling.
- Suction Cups Falling Off: Clean and dry both cups and surface regularly; replace suction cups if worn or damaged.
- Rust on Metal Parts: Prevent rust by choosing stainless steel models and drying the caddy after every shower.
- Wall Damage When Drilling: Use proper tools, anchors, and avoid excessive pressure to protect tiles and walls.
Routine maintenance and careful installation prevent these issues.
8. How to Organize Your Shower Caddy Effectively to Maximize Space and Convenience in Your Bathroom
Maximize your shower caddy’s usefulness with smart organization:
- Place heavier shampoo and conditioner bottles on lower shelves to maintain balance.
- Use small trays or containers for soap bars, razors, and jewelry to prevent loss.
- Hang loofahs, washcloths, and razors on hooks or towel bars.
- Arrange daily-use items within easy reach, higher or eye level on shelves.
- Clear out empty or expired bottles regularly to avoid clutter.
This organization system keeps your bathroom neat and easy to use.
9. Safety and Maintenance Tips for Keeping Your Shower Caddy in Perfect Condition for Years
Follow these tips for safety and longevity:
- Clean your shower caddy every week with mild detergent and water.
- Do not overload baskets; respect weight limits.
- Check and tighten tension poles or suction cups monthly.
- Choose rustproof materials like high-quality stainless steel.
- Keep shelves dry when not in use to avoid mold and damage.
Proper care keeps your shower caddy functional and safe over time.
10. Why a Tension Pole Shower Caddy Is Often the Best Choice: Key Advantages Explained
Tension pole shower caddies stand out because:
- They don’t require drilling, ideal for rental properties.
- Adjustable height fits various shower ceilings.
- Multiple shelf tiers and hooks accommodate many items.
- Durable and rust-resistant materials offer long-term use.
- Fast and easy installation saves time.
For damage-free, customizable storage, tension pole caddies are an excellent option.
11. How to Choose the Perfect Shower Caddy for Your Bathroom: Key Factors to Consider Before Buying
Make an informed decision by evaluating:
- Shower dimensions for size compatibility.
- Installation preference: suction cups vs. tension pole vs. wall mount.
- Material quality and rust resistance.
- Number of shelves and available accessories.
- Style, finish, and color to match your bathroom decor.
- Budget constraints and desired quality balance.
Selecting the right caddy ensures satisfaction and effective bathroom storage.
12. Top 5 Shower Caddies to Buy Now
| Product Name | Features | Key Benefit | Buy Link |
|---|---|---|---|
| 1. HAMITOR Corner Shower Caddy Tension Pole | 4-tier, adjustable 47-121″, rustproof stainless steel | Quick, tool-free installation | Buy on Amazon |
| 2. SEIRIONE Corner Shower Caddy Tension Pole | 4 shelves, no drilling, stainless steel | Durable & versatile | Buy on Amazon |
| 3. ODesign 4 Tier Adjustable Shower Caddy | Anti-swing, screw fixed, adjustable height | Stable, large capacity | Buy on Amazon |
| 4. Stainless Steel Shower Niche (12″ x 36″) | 3-tier recessed, rustproof, easy-install | Space-saving design | Buy on Amazon |
| 5. Matte Black 2-Pack Corner Shower Shelves | Razor hole, rustproof, corner design | Modern, functional shelf | Buy on Amazon |
FAQs
Q1: How long does it take to put together a shower caddy?
Most shower caddies can be assembled in 10 to 30 minutes depending on the type and your experience.
Q2: Can I install a shower caddy without drilling holes?
Yes, tension pole and suction cup shower caddies install easily without any drilling.
Q3: What if the suction cups on my shower caddy won’t stick?
Clean and dry both surfaces, slightly moisten the suction cups, and press firmly. Replace suction cups if damaged.
Q4: Are tension pole shower caddies rust-resistant?
High-quality tension pole caddies are usually made of rustproof stainless steel ideal for humid bathrooms.
Q5: How much weight can a shower caddy hold?
Weight limits vary but generally range between 15 to 25 pounds. Avoid overloading to maintain stability.
Conclusion
Mastering how to put a shower caddy together is the key to creating an organized and efficient shower space. Whether you choose a tension pole, suction cup, or wall-mounted model, following the right steps ensures a secure and lasting installation. This guide has provided all the tips and instructions you need to set up your shower caddy with ease. Use the recommended products to find the perfect fit for your bathroom. Start today and enjoy a clutter-free, functional shower every day.
Affiliate Disclosure
This article contains affiliate links to Amazon products. If you buy through these links, we may earn a small commission at no extra cost to you. This helps us provide helpful content like this guide.

